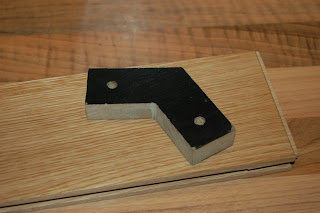
I had some 6mm rod around, and found the center bushing from an old set of rollerblades fitted the rod nicely (I'm saving the rollerblade bearings for later). Now, I do suspect the 6mm rod would be much too light for use in the Y or X axis, but in a vertical direction (Z) I just might get away with it.
With my self-imposed material choice constraints (wood), I reviewed the existing plastic design for the 'x-end-motor' and 'x-end-idler', and simplified it to two basic parts per end. I did a dimensioned sketch (below) before cutting anything. I haven't figured how best to secure the motor or idler yet but will return to that, but I think the motor will incorporate relatively easily to my design.
The x-axis and all belonging to it, is raised and lower by threaded rods passing through captured nuts in the x-ends. The Prusa design incorporates a spring between the captured nuts (
see here) to keep the nuts tensioned on the threaded rod, reducing rattle or back-lash. I'm going to try a long-nut instead of this. There's little or no play in a long-nut, especially if the threads are lightly greased, and with the thread in a vertical direction I don't expect any back-lash problems.
(Ignore the motor in the pict. It's an old 5.25" drive motor, It's been good to get a sense of scale until I order a set. If anyone has used these old motors successfully in a reprap then do let me know.)
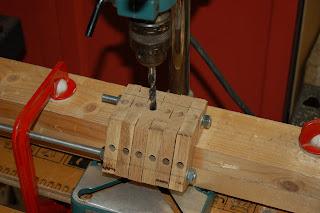
Here's some picts showing my construction of the X-Ends.
The large and small pieces are cut, and carefully glued as per the diagram. I've also drilled two 8mm holes (60mm between centres) in the base before assebly. These will receive the x-axis rods, but I haven't finalised a method to secure them in place.
The verticle block was screwed as well as glued to the base. It's not going anywhere!
Once the glue set, I drilled an 8mm hole through the vertical block, and sunk a 14mm hole in the base to take the long M8 nut.
The nut will be epoxied in. The bushings push nicely into the top and bottom of the 8mm hole to receive the 6mm rod. secured in with a dab of pva.
Here's both X-Ends loosley assembled on either end of a pair of 8mm rods.
There's clearly a lot more detail to be addressed, such as securing the x-rods, mounting the motor and idler, and bedding the long-nut in epoxy.
What has occurred to me though now having got this far, is that the whole thing might work better 'upside-down'. It would give more free area for mounting the motor/idler and the the long-nut would be pushing the assembly rather than pulling it! (see pict below)


